Showing posts with label miniatures. Show all posts
Wednesday, June 17, 2015
Assassin's Creed: 40k ed., Part 1
So there's a new combi-pack of a score or so 40k miniatures that happens to include a simple-to-play side game. It costs too much, the art direction is excellent, and at the end of the day you get a bunch of decent minis, two of which can't get the life-saving cover saves they need to... save their lives. But that's okay, because you also get a really beautiful non-modular board you can use to play one mission.
Anyway, the miniatures.
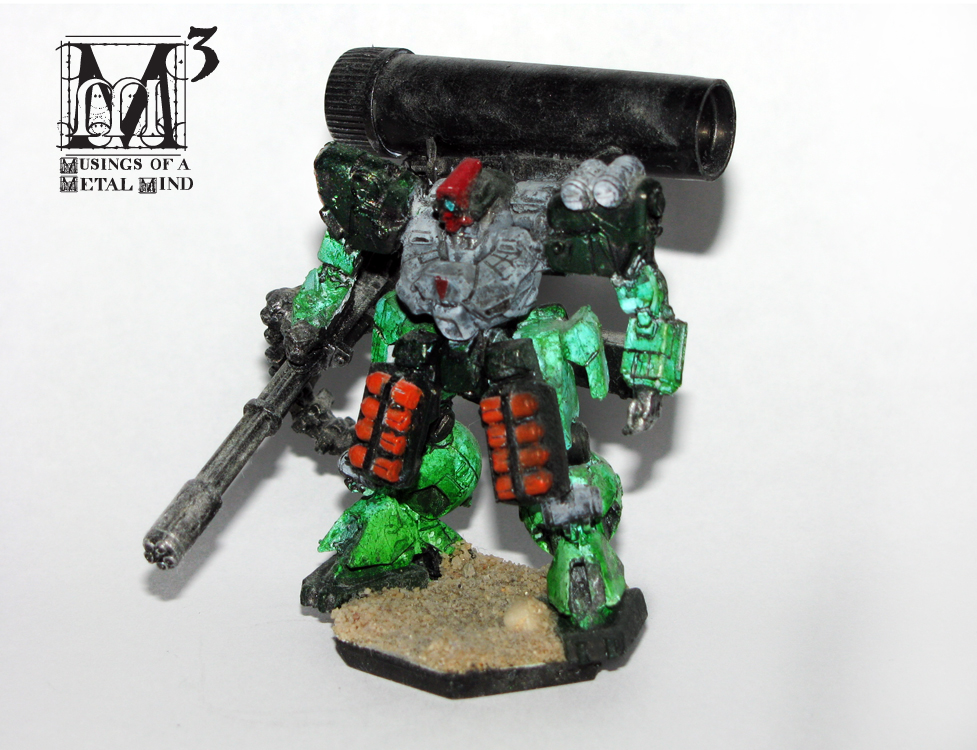
I don't know why I like this banana hatted bag of hammers so much, I just do. Maybe it's that confusion of tubes that sits so improbably atop his neck, maybe it's that you can surround him with a bunch of Librarians and inflate his head-gun's assault value through the roof.
The problem with assassins is that once they appear, everyone wants to shoot them to the exclusion of all else, and rightly so. The further problem with the minis in this set is that the ones that really need to get cover saves are meticulously designed so as not to get said saves. "But", you say, "They get a 4+ invulnerable save!"
Bollocks. 4+ never saves the common Guardsman, and it won't save these chaps either.
I do like the way they give him a bit to leap off of, though, and it's such a good idea that I went against common sense and used this instead of mounting him straight to a base.
I wish Vindicare had been aiming instead of skulking, but it's still decent, solid figure, and unlike the stupidity of the Eversor and Callidus' designs, didn't have any fiddly bits that connected at the wrist, or lower torso that separated at the ass. That little shrine in the ruin is a nice touch.
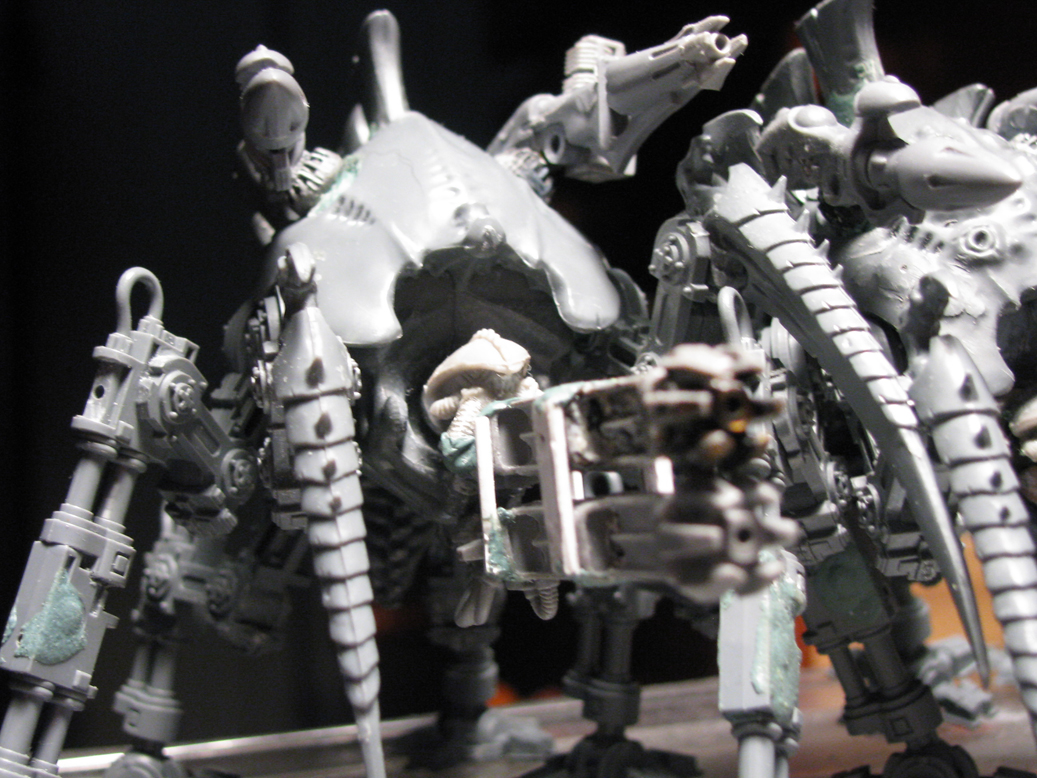
This thing is a straight-up nightmare of a design. The contact point for the foot is insanely small. The long braid is separate from the head, the ass is inexplicably in two pieces, the boobs separate from the chest, the hands a separate at the wrists... it's as though they expected you to store it on the shelf, never transport it, and never even use it except occasionally as a conversation piece. In short, it's the most fragile, badly designed thing ever. To boot, they give you a high thin plinth to secure her to, apparently with equal parts luck and prayer. At least the neck isn't a separate microscopic piece as with the Necron ark driver, but I'm sure they fully tried to make it be.
So, I took my smallest drill, and put in paper clips to reinforce what I could. Also, I mounted her to a spare resin base that would potentially give her a cover save if I chanced to move behind something shorter than, say, an Imperial Knight. If ever there was a reason to march into GW HQ and ask them what the shit they were thinking, it's this thing. Yes, it's probably their best female mini to date (in that it actually looks vaguely feminine) but good God is it ever built not to stay in one piece. One of the precariously small fiddly plastic cables leading from her neural shredder to her backpack even snapped as I was painting her. As you can see, we did not replace that unnecessary bit; they could've run power contacts along the lines of her suit as they did the other three models, but noooOOooo.
Now the paint. You'll notice they look a bit splotchy. They didn't before I spray-finished them. Prior to that they were lovely, with meticulously applied directional highlights.
The horror came when I set them to dry near an air purifier, which sucked every dust mote in the house past them into itself. The result was that they (as well as 3 Thousand Sons Chaos Marines) dried, matte-clear, with a zillion dust particles stuck to them.
I know. I was utterly devastated.
First, I lightly brushed them with a dry brush.
Nothing.
Then a wet one.
Still nothing.
Then I got out the lacquer thinner, sighed heavily, and wet a brush to dilute it further.
The particles came away.
The paint..... well, you can see what happened. Fine detail=ruined. They are good from afar, but far from good. My only consolation is that the CYA wasn't dissolved, causing them to fall to pieces. Nonetheless, we shan't be doing that again.
Next time, the bad guys.
Happy Wednesday, people.
Monday, June 3, 2013
A Blast from the Past...
Some clever chap made a posable Atlas model from the new in-game models using a 3D printer. More here.
I'm not going to bore you with wistful talk of it being a brave new day for the medium. Just that I'm taking a hard look at saving for a 3D printer, and which 3D package for the Mac maps best to my 3DS skills.
Cuz, you know, I like making cool things.
On a related note, Battletech was what got me into minis and wargaming in the first place, and, strangely, I sold off 98% of my large collection of 200+ mechs before I started this blog, because I was unemployed and hadn't played Battletech for years. Who knew a $5 lead Marauder went for $18 these days? I had 3 Atlases, but never actually fielded them all at once. Probably would've been fun to, though.
Anyway this feels like something coming full circle somehow.
Happy Monday, people.
Wednesday, January 16, 2013
RIP Jovian Chronicles: A Bevy of (Not) Doms...
"Doesn't it look like a Kondoh-type Rik Dom?" Marc-Alex Vezina, creator of Jovian said to me in an email. The year was 199- something. (Do keep that in mind when you see the paint jobs, please, I was still finding my way)
1996? '95? Doesn't matter. I had originally struck up an email conversation with him through their fanzine, Mecha Press, beginning a relationship that would eventually get me a gig writing for Heavy Gear. Marc-Alex was gushing about his pet project and its bitchin' designs. Now, having been exposed to a bevy of anime and yet only had Battletech's terrible designs as gaming pieces, the Jovian Chronicles mecha and their RAFM minis were a breath of fresh air. So, I decided to follow along with theme and paint the enemy mecha squadron of Wyverns along the lines of its Gundam counterpart. Moreover, I would have one for each Rik Dom model.
The personal machine of enemy ace Char Aznable. was always painted red, and needed a confidant, aggressive pose, so I chose to model it calling out the enemy (or questioning the falsehood of his cause; Char did that). The Wyvern Commander Type also had a sensor dish mounted on its shoulder for some reason.
The Wyvern was supposed to had a propellant tank, but for some reason, they left it off the mini. RAFM's quality control was also atrocious. Missing parts, weird miscasts... oh well. They're out of business now, I think.
The standard, soldier type Rik Dom was in the purple of the Black Tri-Stars, a squadron of Zeon Aces who specialized in blowing apart capital ships. Their paint scheme somehow spread to every Rik Dom ever issued to a grunt.
I'm torn between loving and being mortified by the old paint, honestly. The more I stare at these photos, the better weathering looks. Maybe it's just me?
Gundam 0083: Stardust Memory brought the Dom Tropen variant in desert colors, not to mention the longer armor skirts and blast shield on the bazooka. Unlike the other three, this one was painted relatively recently, even though it sat, primed black, in its box for an eternity.
I wish these things had been around during the heyday of Battletech. I feel like whatever appreciation they would have gotten on the gaming table is gone forever. Oh well, at least they're collector's items.
Lastly, this Colony Marine version came about due to RAFM's terrible quality control, which led to weird warps on the armor skirts and a missing bazooka. Luckily I had some grenade racks in the bits box, not to mention a weapons upgrade sprue from the large-scale Heavy Gear line, which included this fantastic gatling cannon.
Yes, that ammo belt is the tail from the old pewter Queen Alien. The massive ammo drum was a capsule that pencil erasers came in. Reasoning it would run out of ammo quickly (look up the rate of fire on a vulcan some time) I also gave thing a backup rifle slung on its rear skirt. Nowadays I'd drybrush up from that atrocious green wash job.... oh well, the past is the past, and there are other things to do than strip and repaint old minis.
Aren't there?
Monday, February 14, 2011
Tau'chikomatic Days: Along Came A Major....
For Valentine's Day, we have a love-letter to Shirow Masamune from Statuesque Miniatures. Though she's officially called Mei-lin Mayfair, that's Motoko Kusanagi, right down to the Seburo C-25A. I originally discovered her by way of a posting on Massive Voodoo; they did a different (and by far more intricately detailed) paint job of her, but I recognized the gun and stance right away. She and her sisters on the Statuesque site are quite well sculpted and reasonably priced, and moreover, really really small. That right arm was just big enough to accept a pin, which is good, because I wasn't sure whether it'd stay on, otherwise.
Here she is lecturing the Fuchis on something or other; probably why they can't have that long sought-after organic oil...
(FYI, in the comic, the oil breaks down too quickly and their joints lock up. Sorry, Fuchis)
Her trademark shrug isn't really sculpted on, but a trick of the painting around some of the sculpted lines on the torso. It actually hangs just below her shoulder blades, but I wasn't about to sculpt a tiny hair of green stuff for accuracy's sake. I liked the look of the model, and wanted to present it as stock as possible. It's really an excellent little figure, as are all the others. If you haven't yet, I highly recommend you click on over to Statuesque's site and check them out.
She's also in scale with GW Astartes armor (this is one of 8 Devs that I just finished for a client) , which was a pleasant little surprise. Here's another pic from a (slightly) different angle:
She only looks as tall as the SM because of her pose; she's up on the balls of her feet, which is kind of an awkward pose if you try it yourself (of course, we're not all cyborgs with enhanced equilibriums) I have a Corvus Belli Guija (which looks just like an Appleseed landmate) that she's in perfect scale with as well, although it hasn't been converted yet, so no pics, so sorry. As a consolation, here's another family photo:
Next time, more commission stuff. Hopefully I can get to that Knight Warden before the contest deadline, otherwise he'll have to stay on the back burner awhile....
Friday, December 24, 2010
Merry Christmas,Everybody!
In celebration of the season, a nice little diorama of dwarves welcoming in the Yule Beer. I dunno about you, but I always loved seeing the little Christmas Village scenes at the local hobby store when I was a kid. Seeing model trains run through intricately detailed miniature landscapes was probably one of the things that spurred me into our hobby.
I played WHF before breaking into 40k, and the dwarves, as an army and a miniatures choice, will always be near and dear to my heart. Having missed out on the first few incarnations of the White Dwarf himself, I picked this one up on the anniversary of WD magazine (which, coincidentally, I no longer buy b/c of the price and poor content quality):
Their "official" paint scheme for the model is anything but white, so I immediately painted him grey-white as appropriate. Not the most contrasty paint scheme, but he's called the White Dwarf, which I assume doesn't refer to him being an albino pygmy dressed in reds and greens. All three figs and the shield were painted separately, and the shield required some major pinning to make it structural. If I ever field a WHF dwarf army again, this model will stand for my general. The published rules for the actual legendary trio are pretty unbalanced (and fun) but I don't see ever using those on the battlefield.
The beer cart I made for use in playing the first part of the magazine campaign Bugman's Lament, in which you have to defend a beer shipment trundling its way across the battlefield. I'd always hoped the dwarves would gain a beer cart as a chariot choice when the codex was rewritten, but oh well. I still had a lot of fun making this model from bits and bobs, not to mention forgotten minis found in the dark recesses of my local game store. The cart and barrels are from the Mega Miniatures Dungeon Decor line.
Sharp eyes will notice the dwarf as converted from a standard bearer, with the mastehead cut off and shaft bent back into a whip. I cut and reposed the feet, too. The strongbox beneath his bench came from a Grenadier ogre, I think. Those horses were packaged in loose baggies and sold for $3 apiece, and the yoke connecting them to the cart is made of sprue. The stowage hanging off the sides came from the Mordheim Dwarf Treasure Hunters, among other things.
Because this photo series was done on my kitchen table instead of the lightbox, the lighting here isn't choice, and the colors are getting a bit washed out. Mea culpa.
The idea of the scenario was to get as many beer carts as you could past the intervening goblins and off-board. I went beer cart-light and escort-heavy, opting to blast as many gobbos as I could with Thunderers, and block off any trolls with heavy-armored fighters and a Slayer or two. The special rules for the scenario said you could mount a Thunderer on the cart and fire his weapon in addition to the drover's while on the move, so I did just that. It was touch-and-go for a couple of rounds, but I managed to pull off a win, thanks to the low leadership of the gobbos and the stupidity of the trolls.
The supporting cast for this little diorama is a nice little cross-section of my dwarf collection. Another Bugman is in there, accompanied by Malakai Makaisson and a bunch of artillery crewmen and clansmen. The two female dwarves are from Reaper Miniatures fantasy line, not to mention being out of the ordinary as dwarf minis go. You don't usually see a buxom dwarf rogue, not to mention a firey Runesmith (Runesmithstress?) in GW armies, and more's the pity.
Lastly, the buildings. Made from styrofoam, modelling tallus, sprue, and dozens of other bits and bobs. I plan to do a detailed post about them later, since I love working on terrain and don't do it often enough (mostly because I have no place to keep it).
Merry Christmas to all of you and your families. Hopefully this holiday season you're getting together and crashing your armies against one another over some spiked eggnog :)
Labels:
conversions,
miniatures,
Random Stuff,
Warhammer Fantasy
Friday, October 8, 2010
Dark Heresy Minis: Season of the Witch
These minis are due in part to the fact that Halloween's a-comin' and I wanted to paint something spooky, and partly due to B.Smoove sending me some Flayed ones I had no idea what to do with. Add to that a Reaper Miniatures Succubus I was too prude to paint at the time (her wings are now part of the Hilda Garde III airship) and a dash of extra bits, and you get this nice witch and her murder servitors.
Latent psyker/mechanicus-adept/college students should never take their work home, much less handle it after getting out of the shower. That Necron head on her staff plugged itself right into her brain via that cogitator on her back, and now she's out causing mischief in an already turbulent underhive. At first I was going to swathe her in tattered robes, but in the end I left her as-is; she looks more unhinged this way, and really, what would the alien robot brain on the staff care as long as she provided mobility? As a nod to her previous life, I painted her loincloth with the Mechanicus cog motif. No, this is not the start of a new line of sexy Dark Mechanicus girls. No, I don't know what that key goes to.
Witches need familiars and servants to carry around their spellbooks and whatnot, and this little guy was already in the pipeline to be a weapon loader (it's a short hop from lugging ammo bins to lugging arcane tomes, and the hours are better anyway). He started life as a robed skeleton and got a heavy green stuff cowl and some mismatched mechanical arms from my ever-dwindling supply of Battlemech bits. Those books and things are from the new plastic Flagellant sprue.
Flayed Ones I've only used once in a Necron army, and while they're good for seeing off a small squad of low-leadership troops, they're pretty much a useless one-trick pony (now, if they could emerge and assault in the same turn, that would be worth something). The two B.Smoove sent as a reward for his logo contest were a nice gesture, so I decided to turn them into Murder Servitors, and dressed them up with green stuff, plastic chains, and the skulls of their victims. They already have scraps of flesh clinging to their limbs anyway, so furthering the illusion that they were rags with more green stuff made sense. I almost put human heads on them so as to make them viable generic evil henchmen, but decided against it at the last minute.
To provide some differentiation, the second Murder Servitor has a Wraith surgical bit. Originally the Witch was going to have it and a set of claws on mechadendrites, but she became so full of cables and things anyway it would have made the model too cluttered, not to mention un-transportable to/from gaming sessions.
Lastly, as a treat for staying with me this far, here's a taste of what's next in the pipeline:
More commissions, please. They pay for Tyrannocrons, like this one (of three).
Wednesday, September 15, 2010
Shipbuilding 101: Another Highwind, Part 2
After all that greenstuffing, the only thing left to do is the basing and painting, and you get:
The only thing I didn't do was paint the hot bomber girl on the side, because she would've been so small it would've looked like a pink squiggle. Instead of using my traditional "glue, then sprinkle basing" method, I used some textured paint as an adhesive instead, and then applied the basing materials.
After photographing, I quickly boxed her up and packed her away so as to fend off the temptation to refund the commission and keep the model. I'll have to settle for doing some fine-tuning of my own model, instead...
Next time, back to 40k, maybe some Dark Heresy. I was actually working on a NSFW rogue psyker/necron cultist and some murder servitors while I was waiting for glue to set/green stuff to cure/ washes to dry, not to mention seeming to have finished my Tyracrons' Mycetic Tombs and then forgetting about them. Oh well. The Tyracrons appreciate it anyway. ;)
Tuesday, September 14, 2010
Shipbuilding 101: Another Highwind, part 1
Here I was, all set to cobble together a second Hive Tyrant, and a commission drops in my lap. Not just any commission, either; the guy wanted AIRSHIPS.
As in, the kind I built from Crimson Skies planes. The Highwind and Hilda Garde III, to be exact. The Hilda Garde I wasn't (and still am not) sure about due to the availability of specialty parts, but the Highwind I was pretty damn sure I could whip up. Plus, I've always wanted to improve on that decade-old+ model with better parts and modern techniques.
So, what the hell. 4 kits from 3 eBay sellers later, I started up the works.
Inspired by the fantastic step-by-step articles over at DEI GRECI, I decided to photodocument as I went. Here's how it went down, starting with the Kestrel:
Ugh, what an ugly plane. Let's dismember the fucking thing:
Next, came the Metroliner:
Nice little helicopter, aint he? He gets the chop too:
Man, that was a lot of sawing. Later on I realized I needed the fuselage and sawed off his little tail, too. On to the Ground Hog. In my frenzy, I forgot a before picture, but here's the eBay picture:
After he was chopped, I set to drilling and putting together the subassemblies. The Phalanx still hadn't arrived in the mail yet;
I drilled into the nose and inserted a heavy-guage coat hanger rod for the pusher prop. I also sawed apart those big engines with a jeweller's saw (this took a while, as they're thick), capped the propellor halves with Tau shoulders, and let the rear half be. Those little winglet with guns became the basis for the Highwind's over-complicated tail. I made it with 3 rudders instead of four, so A) it wouldn't be over-wide and B) so I could center the metal bit and drill a pin hole:
At this point, I turned my attention back to the Kestrel parts, and drilled the pinholes for both this tail assembly:
Oh yeah, we also have Groundhog bits to manage. This required more pinning, drilling and fitting, using the tried-and-true method of inserting pins in one part, marking their destination in the other using them and some ink, and then more drilling and glueing:
And while I was at it, I got a jump on the crew section with some more cutting and drilling:
That second rod goes all the way up through one part and into the Kestrel fuselage. The forward window section is supposed to be offset, so you can go out on deck and talk to whatever party member was hanging out on deck (I think it used to be Yuffie, barfing over the side). No there aren't bits small enough to make the little railing. It's just too small. The bit on the front is from an old Sazabi-ripoff Mekton mini that went to a better place, years ago. At this point, I stopped for the day and worked on other things, mostly because there was, as I said, no Phalanx model to hack up.
Till the next day came and it arrived:
Oh look! My work is half done. Let's get rid of that other wing and saw the front dome off that fucker. An half-hour later (god-DAMN it took FOREVER to saw through) I fit everything together, then it still wasn't long enough, so I had to further hack apart the Metroliner, as previously mentioned. Luckily, all that sawing makes for nice, smooth surfaces for Super Jet (tm) CYA glue to adhere together like rock. I also used a bit of sprue, drilled through and pinned, to anchor the rear strut-- oh hell, just look:
I used a bit of plastruct i-beam (I swear those i-beams have a 1,000 uses) to square off the top, and also to use as a mounting point for the engine nacelles. Being wider than the Metroliner, we'll fill it with green stuff after assembly. I also made the clamshell half for the rear thruster that pops out when the thing transforms on disc 4. We're pretty much ready to drill into the fuselage and mount the engine nacelles now, so then you end up with this:
Now she looks more familiar, doesn't she? We'll do something about those ugly parts on the side in a minute. How about from the back:
That SM clamshell will get added after we greenstuff the hell out of it. I added a couple of space marine shoulder pads to round off the nacelles, and then some plastic missile halves (from the same 1/35 scale Tamiya set the mk. 1's bits came from, in fact) to bulk out the fuselage of the upper section. I also used the weensy center bit from the Kestrel for the little hull section on top of the main fuselage, giving us this:
Next went a lot green stuff to smooth out angles and fill in big gaps. The underside of the upper fuselage section, where the Metroliner bit was, needed this especially. I also green-stuffed it to the base(s) and anchored them in place so it wouldn't topple while it cured overnight. In case you're wondering, I didn't buy the Citadel green stuff; A while ago I bought a much larger, much cheaper tube off the internet.
Yes, that's the good old Highwind mk. 1 in the background, envying her younger sister's more true-to-form modelling and metal hull bits.
Tomorrow, the big finish!
Subscribe to:
Posts (Atom)