Tuesday, September 11, 2012
9/11
This day in 2001, the gates of Heaven irised open to receive more than 3,000 souls.
Never forget, America, and stay vigilant.
Monday, August 6, 2012
WIP: Mortarion....
Let's be clear, I hate, hate, hate the Nurgle aesthetic and everything to do with it. However, a Primarch with a big bloody scythe who breathes toxic gas to live is pretty damn cool. Uriel came from Kabuki Miniatures with a big spear and a tiny head, and, having no use for that, I decided to make a Mortarion.
More to come.
Happy Monday, people.
Tuesday, July 31, 2012
So maybe the Japanese have working, armed mecha now...
I like how they drive it through a downtown section of the city, and everyone behaves like they just see this sort of thing every day.
Me, I need this for my zombie apocalypse escape plan.
Sunday, July 22, 2012
Commission: Dark Eldar Raiders
Some more commission work, this time a trio of Dark Eldar Raiders to flesh out a client's transport section for his insane sex maniac elves. Note to self: never, ever do three of them at once again. Not only are you signing up to paint a relatively intricate small vehicle, but you also paint the squad of DE that's riding on the bloody thing, and that's an incredible pain in the ass. Honestly, I don't know how you DE players manage it, much less keep the things intact for transport with all those spiky bits and things sticking out. Honestly.
The perk of doing three at once is, of course, that you can mix and match the hangers-on to your heart's content (within the limits of the parts, anyway), as well as the trophy skulls and other oddments. I had a witch barge and an all-helmet barge going, and I'm pretty certain one of those weirdos is swinging a net, too.
I had a wild impulse to combine some spare sails and put them out to the side, Jabba's Sail Barge style, but the client nixed that idea, preferring to have them stock. It would have given the things a much cooler silhouette, but oh well.
Wednesday, July 18, 2012
Commission: Adeptus Mechanicus Grand Magos
So this nice fellow from a far-off land had a job for me: replicate my old Grand Magos model. As you can see, one of these things is clearly not like the other. The reason for this is quite simple; me old mate there on the right was made with no small amount of discontinued parts (can you spot the RT dreadnought arm? ), which make replicating troublesome, to say the least. But, enough of the stuff is still on the market, so try I did.
Based on the old metal Oblit body, he started out about the same, but it was devilishly hard to get servo arm bits without buying a tech marine, and some of those other things, well... they came from models that just around anymore. Luckily there bits of other things (and eBay) to take up the slack. I realized too late I could've built a claw around that assault cannon, but then again, it might not have held together anyway without a great deal of metal.
One thing he does have over the original (besides a wicked barbed power claw made from crux harpoons) are these bloody great cog shoulder pads that I wish I'd had the foresight to put on mine, but oh well, we do as we must.
No servo harness backpacks to had out there, either (again, not without buying the full kit) so I made due with SM and Tau parts. If I hadn't been running low on Dragon Forge cabling, I would've made him a trailing sheaf of cables, too, but this way the hem of his robe is unmarred.
People ask me how I build the things and where I get my ideas, but they don't seem to believe me when I tell them I just keep putting bit on until it looks right. Things seem to come together organically. When I build copies of something (given the same parts) the second one is rather forced and unfulfilling, which is why I suppose I'll never have a true parking lot of 18 identical Chimeras.
I imagine this fellow needs a little crew of Servitors running behind him just to fill up the ammo tins on the assault cannon. I think I'll start including big ammo drums on models that don't have internal magazines for some realism's sake. I understand the new huge bolt cannon on the IG Avenger is only a pathetic S6, which isn't going to do so much as annoy a lot of vehicles out there. S6? Really? Not even armor bane? Sad.
I contemplated giving him a pair of smaller sub arms (for fine work) but they only would've gotten in the way, and made the model look rather too busy, visually. Plus, the Admech make Titans, not landmates, dammit. Anyhoo, at last report this fellow arrived at his new (and very satisfied) owner's domicile intact. Yay postal service, and on to the next project!
Thursday, July 5, 2012
Wednesday, July 4, 2012
Happy Fourth of July!
Happy 4th, Everybody!
What are you doing on the Internet? Get out there and do something even though it's hot as fuck and you should probably be inside.
On second thought, stay inside. Enjoy the Internet, and remember that the greatest purveyor of porn, bootleg movies, and all manner of social networking came from, among other things, US tax dollars. Now that's some useful spending.
Happy 4th, people.
Sunday, July 1, 2012
Triarch Stalkers or Is that a Heat Ray in Your Pocket, or Are You Just Glad to See Me?
Like the Ghost Ark, the Triarch Stalker is a real mixed bag of pain and pleasure. On the one hand, he's a handy little spider-tank with a melta gun--
"A MELTA gun? For Xenos you say?"
Oh yes. He can even stabby-stabby a tank with those wicked not-Dred CCS forelegs of his. Why, he'd almost be perfect except for the incredibly stupid open-topped design philosophy the Necrons apparently have now. Oh, and is that gun a turret? We aren't told. It could be.
Now, if you had illusions of Defiler-like posable legs, keep dreaming. Only those great forelegs have the barest lip service in terms of hinges. The thing is a dream to assemble.... mostly. Yet again, we're being punished by complexity. Complexity which looks amazing when it's painted and together, but...
Damn, I forgot to color-balance that photo. Oh well. See that little howdah on top? It doesn't quite synch up if you're building the thing in subassemblies, so while I can take him apart and store him in two easy sections, it's held on there mainly by tension and hope. And yet again, we're treated to a pilot that's broken down all the way to separate legs, and neck . Not a lot of places for anything but the smallest magnets, either. If the Stalker legs were hinged and folded at every joint (Bandai and many other model makers figured this out twenty years ago, by the way) the little monster would be a snap to store. Otherwise, you have to slot the cockpit next to this fellow:
What a nasty looking little monster. Why didn't they make a codex entry for some kind of giant jumping spider or something that just ran around and crushed things using the new 6E "monstrous creatures can slam now" rules. (Did I mention how pleased I am with the new Necron line? Because I am. Well, 90%, anyway.). Speaking of bugs, can we cross-utilize a Tervicron as a Triarch Stalker?
Hmm... well, the height's there, but one of these spiders has no cannons to speak of (unless you consider the monocle on the spider head, which you could, I suppose) and the Tervicron just isn't wide enough, either. I suppose, if the other player were forgiving enough?
I leave you with something you've never see (unless you're fielding Necrons): a shot of the thing's shapely backside. Being open-topped, if someone blasts him with a big gun or smacks him around with a big enough stick, the poor fellow's going to go all legs up. Of course, being AV13 this isn't going to happen very quickly, and who knows how long those 3 hull points will last against nasty Eldar lances and hordes of Ork rokkit launchas? It'd last longer if they gave him a pair of CCW's and a secondary gun, that's for sure. Not a perfect design by any means, but better than the Necrons had before, and that's something.
Happy Sunday, folks.
Thursday, June 14, 2012
Reviews?
Should I do 'em?
Some folks have approached me about reviewing their products. As you know, I tend not to pull any punches, being from the Honesty School of Opinion Writing, so it could be a fun exercise for all concerned.
This isn't an attempt at filler, either. I have a backlog of photos for posts right now, and an even larger one of pending hobby projects (I hear you, ZOE Vic Viper).
So what do you think?
Saturday, June 2, 2012
Tutorial: the Weathered Penny
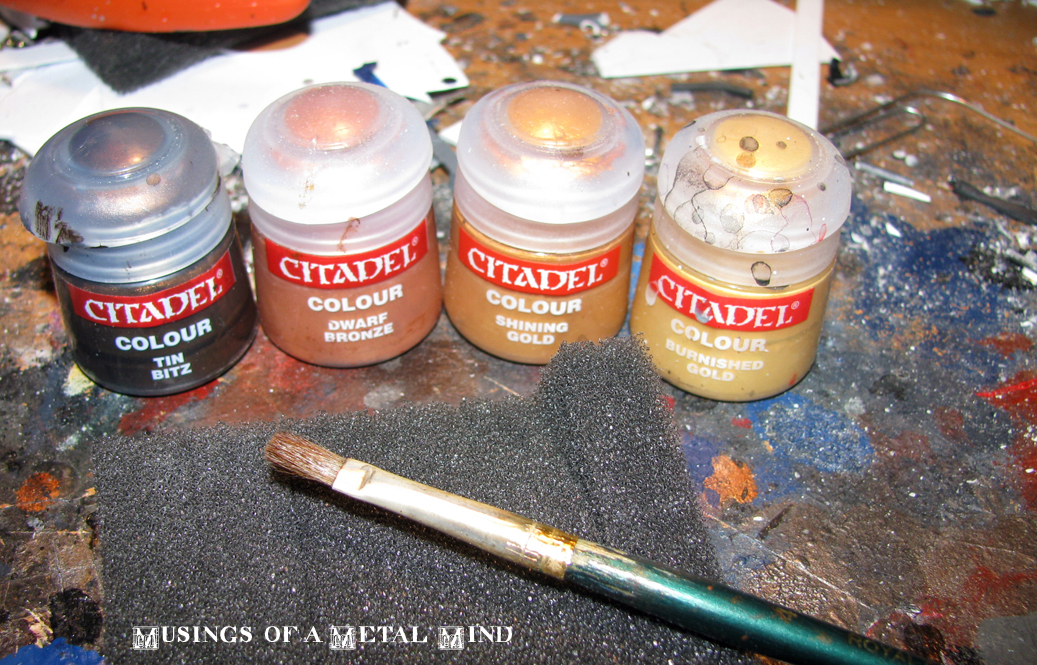
So many people have asked about the weathered penny, that I thought I'd share how I do it, this time with pictures. (No Tachikomas in this one, unfortunately,they're still sleeping off the effects of their victory party). Above are the materials you'll need, including the flat brush (available at any art/hobby store) and mini/tray grey foam. I realize that Citadel may have changed some of their metals since this photo was taken, but from the color spread, you get the idea. In additional you're also going to need, of course, model:
This bit was primed in black, then dry brushed with Tin Bitz. The tin Bitz was applied very hastily and sketchily,with more attention paid to raised areas and places where the primer was allowed to pool and bubble a bit.
At this point we're going to start infusing th foam with color, by way of simply dipping the brush tip in the pot and wiping most of it away onto the foam. From this point on, the foam's going to be your source of pigment for dry brushing and blending. Every so often we'll need to re-infuse it, as the paint drys quickly through use. (This technique, though kinder to brushes, is still dry brushing, so I recommend having backup brush and switching off between the two, cleansing the first one and starting with the dry, fresh second one. After you can give them a bath in Simple Green and water and they'll be like new.)
With only the barest paint left on the brush, you're going to begin running the flat side of the brush along the raised edge of the model, like so. You'll be leaving a thin line of paint on that raised edge, and periodically flicking inwards over the flat areas. Not broad, covering strokes, a light touch in important here to achieve that weathered, worn effect:
You're going to want to hit all the major edges, then com back and hit those minor ones. Not that we never actually do any large applications over the major areas, but keep flicking in just barely from the edges.
After each complete edging, you're going to be blending successively brighter colors into your foam palette. The advantage of the foam come in here; the paint's pooling and mixing here with each wipe, and getting progressively lighter while still maintaining bits of the last color. This multi-toned brightening effect gets passed on, of course, when you start anew with the new color:
As you can see, this technique can be applied over even complex areas. Just make sure you don't go hog-wild; leave broad areas untouched or barely-touched by pigment, and concentrate on the edges, continually building up tone. It's important that you let your off-duty brush dry out completely, because wet-brushing will ruin the rough finish of this technique.
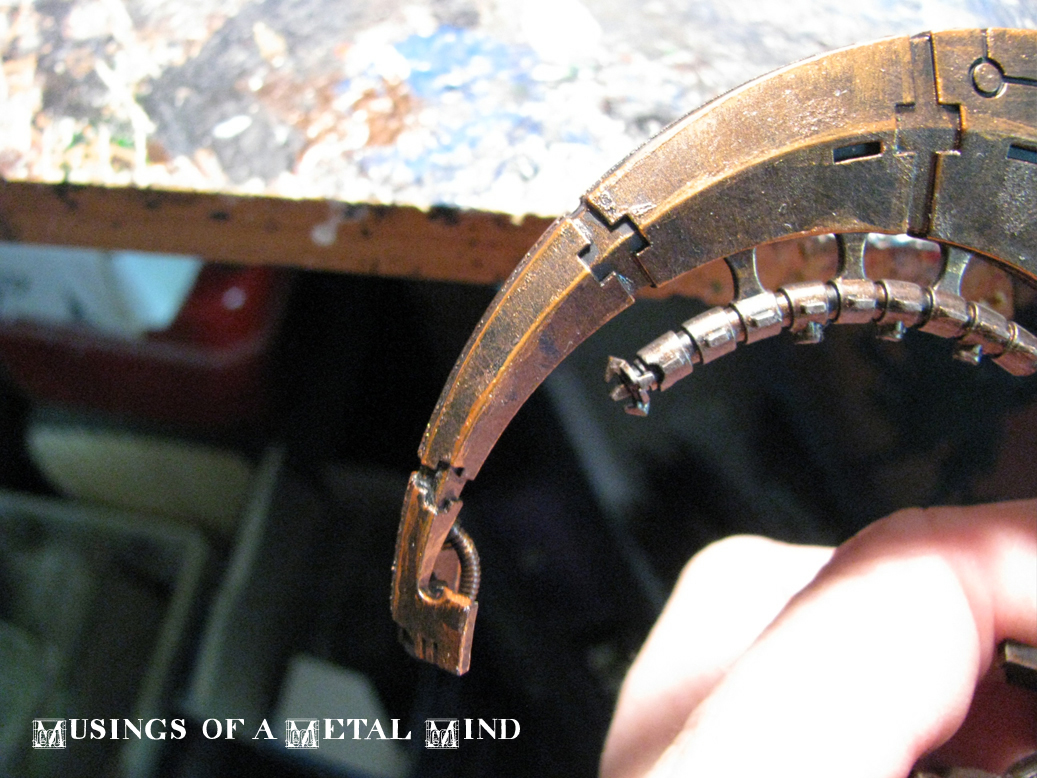
in the end, you end up with a nice weathered surface very much like this one. I nearly drove myself crazy using this on my Ghost Arks (you'll see why next post). Hope this helps, folks!
Happy Saturday.
PS, it looks like the insectoid Scythes won out, so there will be no flying croissants here folks. Just more bugs with better parts from the new range.
Subscribe to:
Posts (Atom)